

Vegan Semlor
With a cashew coconut cream filling and soft cardamom bun. This is a subscriber only recipe.

We lived in Sweden for about a year and a half, including two winters, and the semlor are one of the things I miss mos . January and February are the semlor season in Sweden and they are everywhere. Bigger supermarkets will have whole sections dedicated to semlor of all different types - gluten-free, vegan, different flavours, and so on. They are truly excellent and not nearly as sweet as most common Swedish desserts (you might be more familiar with the singular, semla).
I tried several different vegan versions in Gothenburg but was never entirely happy with the whipped cream filling used. Processed vegan whipping cream alternatives are mostly fat and starch and I find that they leave an unpleasant greasy coating in the mouth, an element that I can’t seem to get past.
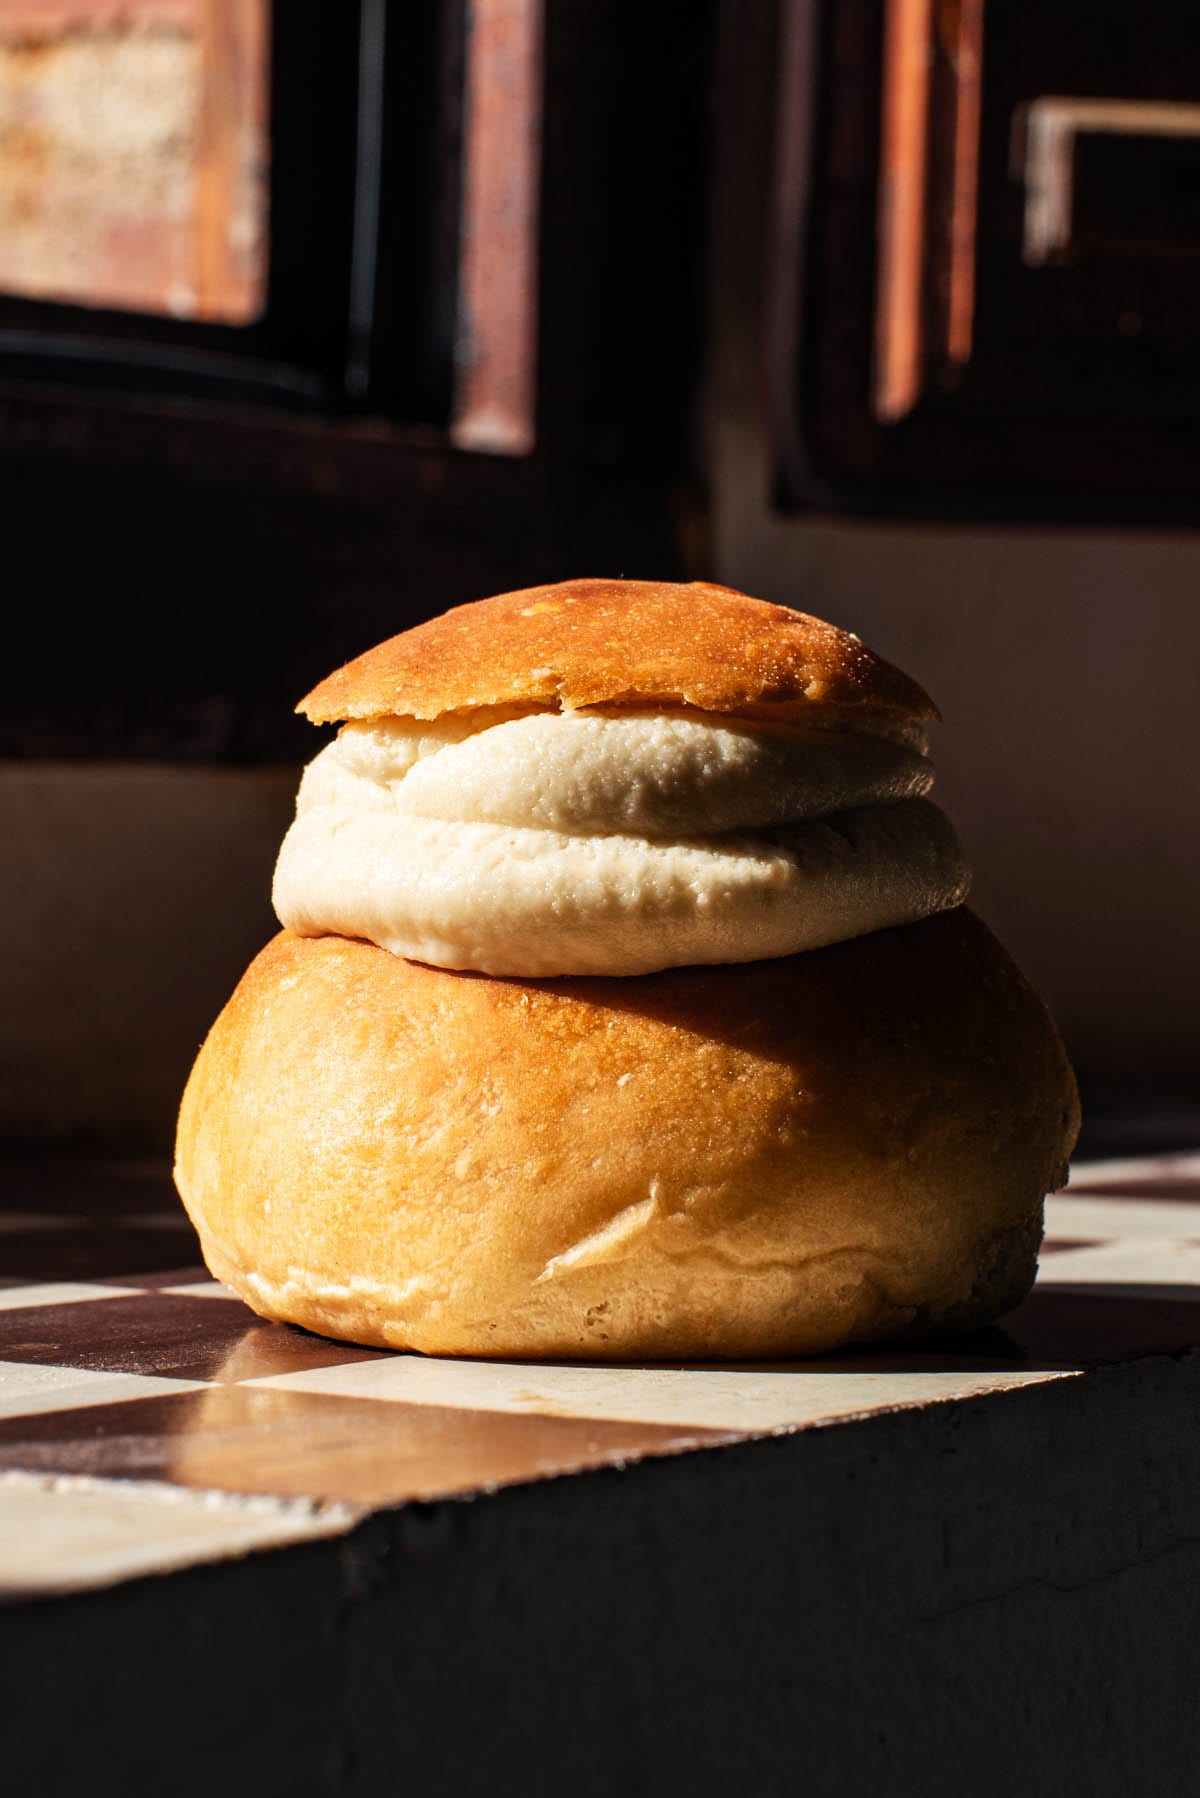
This recipe is made with a coconut and cashew nut cream filling that’s just lightly sweet. It is not really a whipped cream, more like a not-sweet frosting or a kind of mousse, but it’s very good. If you have a dairy-free cream alternative that you like, you can use that instead. If you are using the cashew cream please note that the nuts will need to be soaked for a couple hours before blending, and that the cream benefits from chilling for a little while.
The cardamom bun base is very light, soft, and also not too sweet. The dough has a pretty high hydration to get it to be so light but that means that you can knead it quite easily with an electric hand mixer if yours has dough hooks (and most do come with them, the spiral ones). A little flour for shaping is helpful.
One more thing. I prefer almond paste for the filling rather than marzipan and note that if you’re using marzipan it’ll be a little sweeter. If you can only get marzipan, no worries, just use that. And if you can’t find either, you can use almond flour and a little more milk, but it won’t be quite as good.
Find the full recipe below. Please keep in mind that this is a subscriber-only recipe and that it won’t be on occasionallyeggs.com.
Cashew Coconut Cream
This is adapted from Cannelle et Vanille’s latest subscriber recipe for the dairy-free tiramisu.
150 grams raw unsalted cashews
Cream scooped from the top of a can of full-fat coconut cream or milk
2 tablespoons lemon juice
2 tablespoons honey or maple syrup
½ tsp vanilla powder or seeds of a vanilla bean (sub 1 teaspoon extract)
Cardamom Buns
250 ml non-dairy milk, plus more for brushing (oat, almond, etc.)
50 grams oil (I like coconut, but any light-tasting oil will work)
30 grams maple syrup or honey
2 ¼ teaspoons dry yeast (or 1/2 cube fresh)
350 grams light spelt flour
1 teaspoon fresh cardamom, coarsely ground (sub a half teaspoon pre-ground)
½ teaspoon sea salt
Almond Filling
75 grams almond paste
Bun crumbs (see instructions)
Non-dairy milk as needed, to make a paste
Instructions
Cashew Coconut Cream
Start by soaking the cashews. Place them in a heat-safe container and cover with boiling water. Cover with a lid or plate and soak for 2-3 hours, or until very plump and soft.
Once the cashews have soaked, drain them and rinse well. Add to a blender (an immersion blender also works well for this) with the coconut cream, lemon juice, honey, and vanilla. Blend until very smooth, scraping down the sides as needed. A splash of water can be added if absolutely necessary but don’t add too much.
When the cream is smooth, transfer it to a container and refrigerate while you prepare the buns.
Cardamom Buns
Heat the milk in a small saucepan until steaming. Don’t bring it to a boil.
Pour the hot milk into a heat-safe mixing bowl and add the oil and honey. If using coconut oil, wait until it melts. Otherwise mix well and then check the temperature with your finger - when it’s safe to add the yeast, the milk mixture should feel just warm to the touch. If it’s very hot it will kill the yeast.
When ready, mix the yeast in with the milk mixture and set it aside to bloom for ten minutes. It should be foamy.
Stir in the flour, cardamom, and salt. The dough will be quite wet. Knead, preferably with an electric mixer if you have one. As mentioned, this can be kneaded with an electric hand mixer and the one I tested with is one of the cheapest available.
Knead for about ten minutes, or until the dough is soft, smooth, and elastic. When you touch it lightly it shouldn’t feel too sticky.
Cover the dough with a plate and set aside to rise in a warm, draft-free spot for an hour, or until doubled in size. This can take a long time in a cold place so find somewhere a little warm.
Once the dough has doubled, punch it down and divide into 12 equal balls. Form round buns, using a light sprinkling of flour if needed to shape. Rotate the balls on a clean counter to create some surface tension (see here), then place onto a lined baking sheet.
Cover with a tea towel and set aside to rise again for 30 minutes. Preheat the oven to 180°C (350°F).
Brush the buns with a little non-dairy milk, then bake for 18-20 minutes, or until lightly golden. Cool fully on a wire rack.
Assembly
Cut the top off the cooled buns, just about two centimetres down from the highest point. Remove about ⅓ of the interior of each bun and place the crumbs into a mixing bowl. Add the almond paste and a little milk, then use a fork to mash this into a paste, adding milk as needed. You shouldn’t have to add much milk but the almond paste can take some time to soften.
Take the almond paste mixture and use it to refill the interior of the buns. Top with the cashew coconut cream (or whipped cream) and then add the hat, the little bit of bun you cut off the tops.
Optionally you can sprinkle the tops with a little powdered sugar but I never do. I recommend storing the buns in the refrigerator after assembling, or you can add the filling per bun as needed. The plain cardamom buns will keep for about three days in a sealed container at room temperature and the cashew coconut cream for about five days in the refrigerator.
That’s it, I hope you love these as much as we do! The cardamom buns are also well worth making on their own if you don’t really want the filling. I also tried these out on our neighbours here, both in their 70s, and they thought they were fantastic too.